




















Artwork Guidelines
Prepare artwork so layout, cutlines and special effects can be reviewed separately. These guidelines help start the file review; final dimensions and detail limits depend on the selected material and process.
File formats
Vector files keep type and cutlines sharp at any size. One file per design, named with the product and version.
| Format | Use | Notes |
|---|---|---|
| PDF (PDF/X-4 preferred) | Print-ready artwork | Fonts embedded or outlined; cutline and white as spot colours; bleed included |
| AI / EPS / SVG | Vector artwork and cutlines | Outline fonts; link or embed images; keep layers named |
| INDD (packaged) | Multi-design layouts | Package with fonts and links, or export PDF/X-4 |
| PNG / JPG / TIFF | Photos and raster artwork only | Typical 300 dpi at final size; cutline still needed as vector |
| ZIP | Several designs or large files | Or share a link in the quote form notes |
Colour specification
Tell us how colour is judged: by the file, by a Pantone reference or by a physical sample.
Size, bleed and safe zone
Three outlines on every file: where the label is cut, how far the artwork extends past it, and where text must stay inside.
Fig. R03 · bleed, cutline and safe zone on a rounded-rectangle label
| Item | Typical value | Why |
|---|---|---|
| Finished size | Width × height of the cut label in mm | The size you specify; liner and sheet size are separate |
| Bleed | 1.5–3 mm beyond the cutline (typical) | Covers cutting tolerance so no white edge shows |
| Safe zone | 1.5–2 mm inside the cutline (typical) | Keeps text and logos clear of the cut |
| Corner radius | Rounded corners recommended | Resist lifting and cut cleanly on film |
| Tolerance | Stated in the quotation | Depends on material and cut style |
Cutlines and shapes
The cutline tells the cutter where the label ends. Supply it as its own layer, or we draw it from your artwork and show it on the proof.
Supplying a cutline
Cutlines mixed into the artwork print as a line or get lost.
Preparation: keep the cutline on its own named spot layer, stroke only, with no fill and a closed path. Confirm the naming convention with the proof requirements.
Fine detail and sharp points
Narrow bridges and sharp points tear or do not cut cleanly.
Preparation: review narrow bridges and sharp inside corners. Agree any adjustments with the cutline proof before production.
Die cut vs kiss cut
The same artwork needs a different cutline for individual pieces and for pieces on a backing.
Preparation: identify individual pieces or kiss-cut labels on a backing sheet, and include the required backing outline in the layout.
No cutline yet
Artwork without a shape delays the quotation.
Preparation: send the artwork and finished size, and agree any cutline preparation required before the proof is approved.
White ink on clear and metallised films
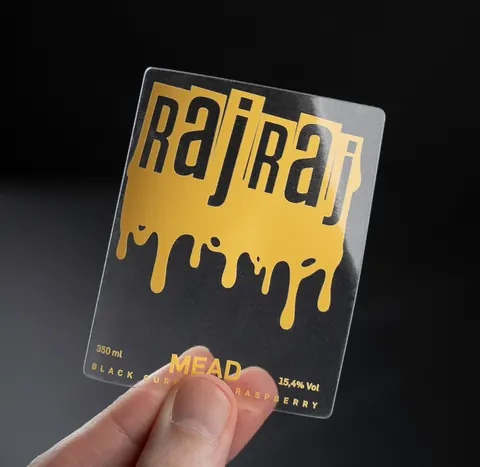
On clear or reflective films, mark the areas that need opacity and those that should reveal the background. A separate white-ink mask may be used; the layer sequence and coverage are confirmed for the selected construction.
Fig. R05 · colour over a white ink layer on clear film
Fonts, line weights and images
Review fine type and lines at final size on the selected material. Texture, reversed areas and print treatment affect the detail that should be approved by sample.
| Element | Detail to review | Notes |
|---|---|---|
| Positive text on film or coated paper | Review at final size on the selected stock | Sans-serif reads smaller than serif |
| Reversed (white on dark) text | Review reversed detail on the physical proof | Thin strokes fill in |
| Text on textured or kraft paper | Larger than coated stock | Texture and ink gain soften detail |
| Line weight | Fine-line limits confirmed with the artwork and process | Hairlines disappear |
| Images | 300 dpi at final size (typical) | No upscaling; convert to CMYK |
| Barcodes and QR codes | Vector, with quiet zone | Agree a scan check on the actual printed proof and intended device |
| Fonts | Outlined or embedded | Keep an editable version for changes |
Numbering, codes and multiple designs
Sequential numbers, batch codes, QR codes and multiple designs in one run.
Proofs and approval
Agree the proof and approval reference for the order. A PDF checks layout; stock samples and physical proofs answer different questions about colour, texture and application.
| Proof | What it checks | When |
|---|---|---|
| Digital proof (PDF) | Layout, size, cutline, white ink layer, bleed and text | Agree the approval route and request changes before production |
| Material sample | Material, finish and adhesive in hand | New constructions; from the sample pack or a sample roll |
| Press proof | Colour on the final material and process | Colour-critical work and new brand colours |
| Approval | Your sign-off on the proof is the reference for production | Changes after approval re-start proofing |
Before you send
Ten checks that avoid a proof round.
- Vector PDF, AI, EPS or SVG; one file per design
- Fonts outlined or embedded
- Colour in CMYK or named Pantone references
- Images at 300 dpi at final size
- Bleed added on every side; key content inside the safe zone
- Cutline on its own spot layer, closed path, no fill
- White ink on a spot layer named “White” (clear or metallic films)
- Barcodes and QR codes as vector with quiet zones
- Variable data as CSV with field order
- File named with product, size and version
Separate the effect from the printed artwork.
Label each mask so the intended appearance can be reviewed at final size.
Compare the construction, not just the effect.
These product pages show the material, finishing choices and questions to settle for a quotation.